Table of Contents
Introduction
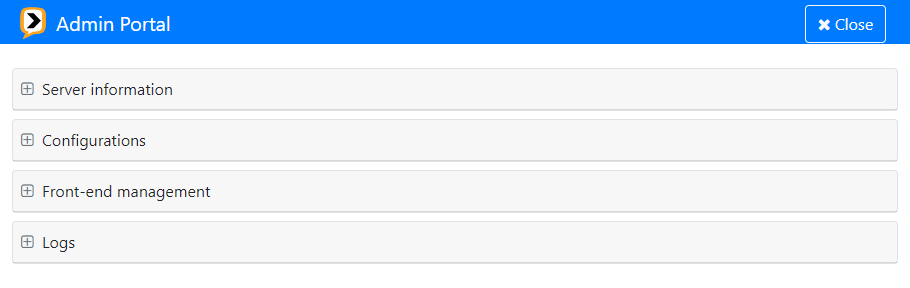
The admin portal can be used to configure applications, manage front-end versions and inspect server logs.
To access the admin portal, navigate to https://<your-domain.com>/admin_portal.
The page loads and contains four collapsible panels that will be discussed in order of appearance in the following sections.
Server Information
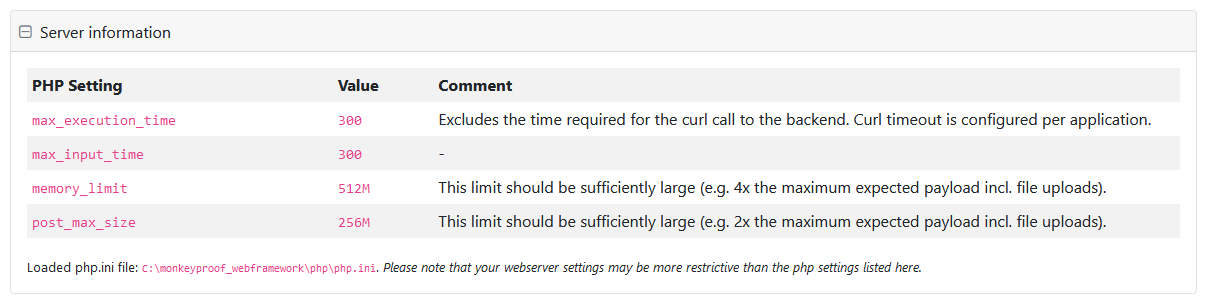
The server information panel shows some relevant PHP settings.
Configurations
The Configurations panel can be used to add, edit and remove configurations.
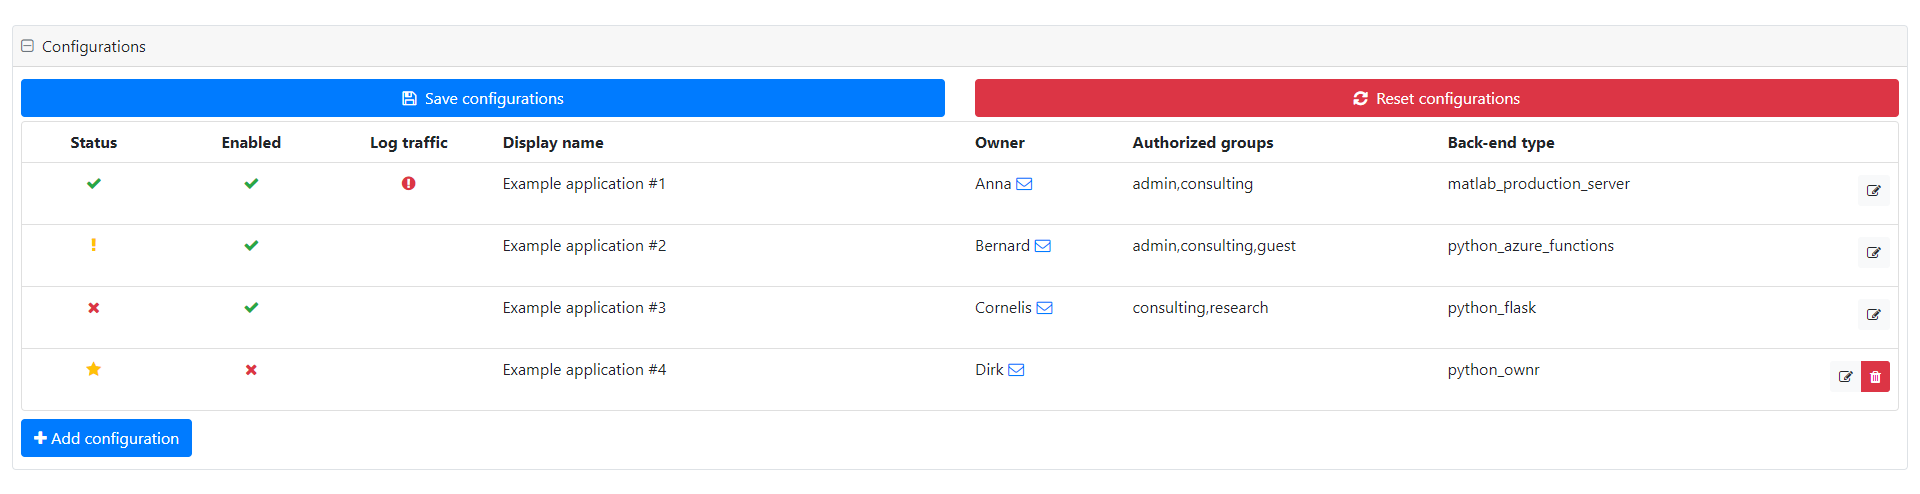
The configurations are shown in an edit grid, displaying the following columns:
- Status of the configuration in the admin portal, which can be:
- Unchanged, when the configuration has no unsaved changes.
- Modified, when the configuration has unsaved changes.
- Remove, when the configuration is marked for removal.
- New, when the configuration has never been saved.
- Enabled indicates whether the application can be seen in the user portal.
- Log traffic indicates whether traffic logging is enabled.
- Display name the name that is displayed in the user portal.
- Owner the application owner.
- Authorized groups authorized user groups.
- Back-end type the application back-end type.
Edit configuration
To edit a configuration, click the edit button on the far right. The configuration settings expand and can be edited. The following options are available.
- Enabled Select to show the application in the user portal.
- Display name Name as shown in the user portal.
- Application Slug Part of the URL that is unique for this application.
- Log traffic Select to log traffic.
- Front-end version override Applications define a front-end version, usually a production build of the same version used during development. This can be overriden here.
- Authorized groups Restrict access to the application to groups of users. Leave empty for unrestricted access.
- Application owner Name of the application owner.
- Application owner email Email address of the application owner.
- Description Description of the application shown in the user portal.
- Documentation URL Link to documentation pages.
- Back-end type Discussed in the section below.
Back-end type
Currently, four back-end types are available:
- MATLAB Production Server https://mathworks.com/products/matlab-production-server.html
- Python Azure Functions https://azure.microsoft.com/en-gb/services/functions/
- Python Flask https://flask.palletsprojects.com/en/2.0.x/
- Python ownR https://functionalanalytics.nl/
Each back-end type has some specific settings, that will be discussed in the relevant sub-sections.
The back-end settings are grouped in three categories:
- cURL options PHP curl_setopt options, see cURL options.
- Cache Settings for connecting to a REDIS database that can cache the session state, see Cache.
- Application data Key value pairs that can be provided to the application during initialization, see Application data.
Python ownR
The Python ownR configuration has one specific setting that is not part of the above mentioned categories:
- function_name The ownR entry point function.
cURL options
To connect to the back-end server, cURL options can be specified. The options must be provided as valid PHP curl_setopt key-value pairs.
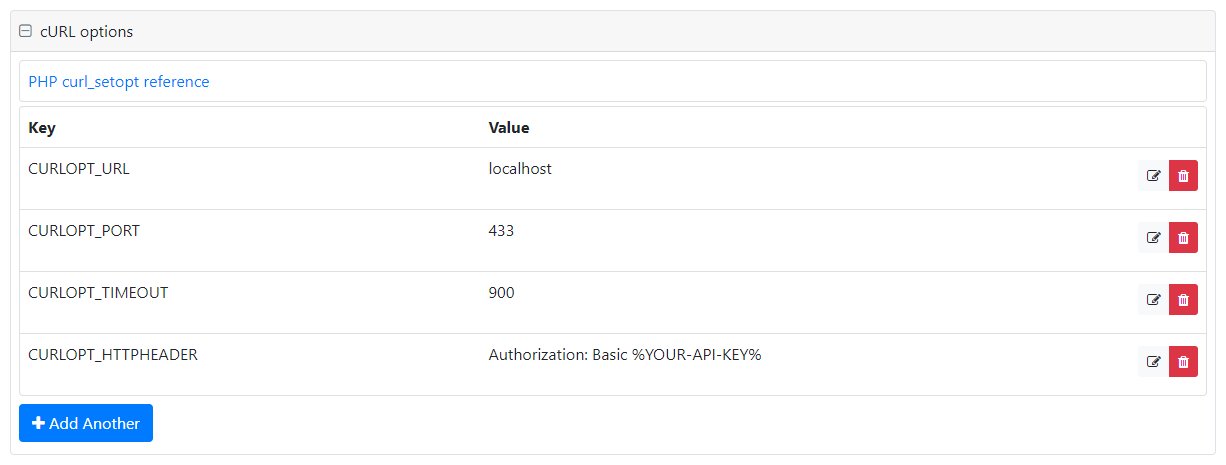
The values are categorized into five types:
- Array An array of string values.
- Boolean
- Number
- Text
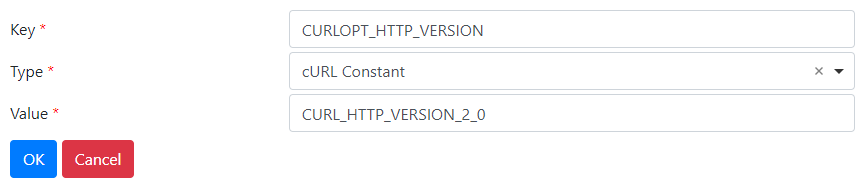
- cURL Constant The name of a cURL constant, e.g. for CURLOPT_HTTP_VERSION you could specify CURL_HTTP_VERSION_2_0.
- File Contents The file contents value consists of three parts:
- File name The name under which the file will be saved on the server
- Base64 encoded To switch between Base64 encoded and plain text contents
- Value The actual file contents
To specify an option, fill in the Key and Type field. After selecting a type, the corresponding Value field will appear. Fill in the value and click OK.
When specifying Base64 encoded contents, use the raw encoding. For example example becomes ZXhhbXBsZQ==.
>> matlab.net.base64encode('example')
ans =

    'ZXhhbXBsZQ=='
>>> base64.b64encode('example'.encode('ascii'))
b'ZXhhbXBsZQ=='
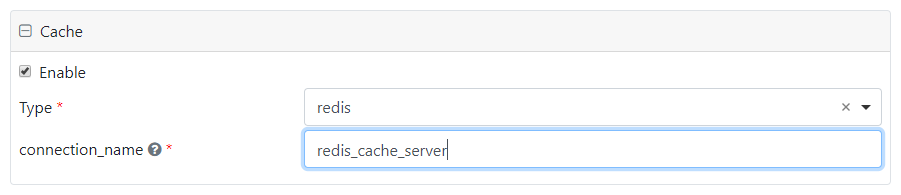
Cache
The provided back-ends by themselves are stateless. In order to build statefull applications, a caching service can be setup. To enable caching, select the checkbox and choose a cache Type. Currently, only redis is available.
MATLAB Production Server
Caching with redis can be configured in the MATLAB Production Server dashboard. After that, only one setting is required in the configuration:
- connection_name Redis connection name as configured on the MATLAB Production Server.
Python back-ends
The Python back-ends can be configured to connect to redis using the PyPi redis package. To connect, at least the following fields need to be specified:
- host Host name of the redis server.
- port Port on which the redis server runs.
Other fields are optional. See the project page for more information.
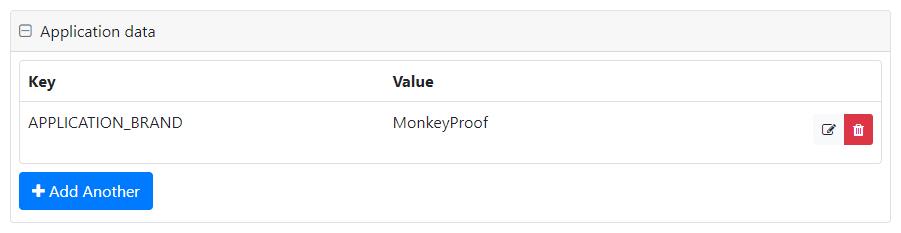
Application data
Application data can be passed to the back-end application, such that parameterized calls are possible. Key-value pairs can be specified for this purpose. There is no pre-defined format.
Add, remove, save and reset configurations
Add configuration
To add a configuration, click the Add configuration button. Fill in all mandatory fields and click OK. The new configuration will appear with status New. Save the configurations to make the change permanent.
Remove configuration
To remove a configuration, open it for editing and select the Remove this configuration checkbox. Then, click OK. The status field shows Remove. The actual removal of the configuration takes place when the configurations are saved.
Save configurations
To save the configurations, click the Save configurations button. This will save all configurations with status New or Modified and remove all configurations with status Remove. Configurations with status Normal will not be saved, i.e. they remain as they are on the server.
N.B.: This action cannot be undone.
Reset configurations
To reset the configurations, click the Reset configurations button. This will discard all changes (New, Modified and Remove) and reloads the configurations from the server.
N.B.: This action cannot be undone.
Front-end Management
The Front-end management panel can be used to upload new front-end builds, or to remove builds from the server.

Upload front-end build
To upload a new front-end build, click the upload button. A file dialog prompts you for the location of the zip-archive containing the build. Select a file (we suggest to keep the original file name as provided by MonkeyProof Solutions) and click OK. When the file is successfully uploaded, a message is displayed at the top of the screen.
Remove front-end build
To remove a front-end build, select the Front-end version to remove in the select box. Then, click the remove button. When the build has been removed, a message is displayed at the top of the screen.
N.B.: This action cannot be undone.
Logs
The Logs panel can be used to download server logs.
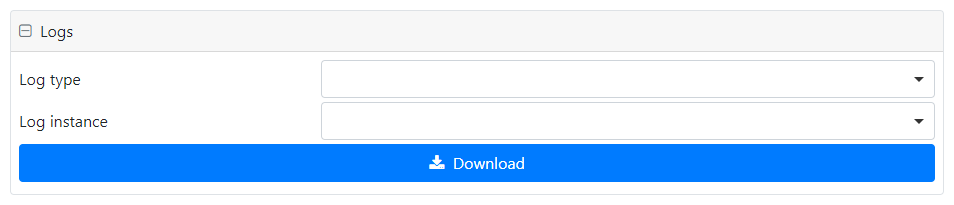
Downloading logs
To download a log file, first select the log type in the select box. Then, select the log file from the log instance select box and click the download button. A file dialog prompts for a location to save the file.